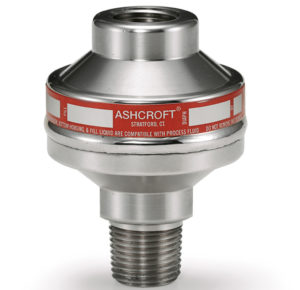

740-741 High-Displacement Diaphragm Seals
740-741 High-Displacement Diaphragm Seals
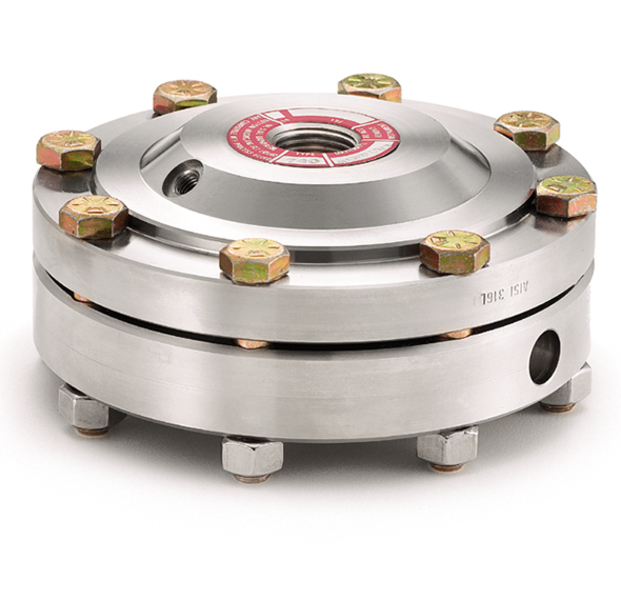
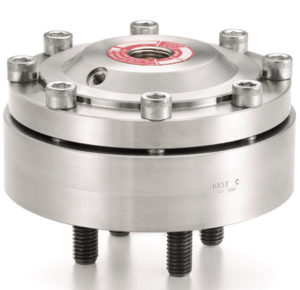
The Ashcroft® 740 and 741 high-displacement diaphragm seals or isolation devices are used with low-ranged instruments or high static pressure dp gauges with low differential pressure.
Features & Properties
Use & Application
Downloads
Features & Properties
Use & Application
The 740 and 741 high-displacement diaphragm seals are ideal where low pressure measurement and process protection are essential:
Downloads
Data Sheets
Installation + Maintenance
Selection Guides
Product + Technical Information
- 📄 Product Information Page Product for Sour Oilfield NACE MRO0175 and Sour Petroleum Refining Operations NACE MRO0103 ASH-PI-60D 🇬🇧
- 📄 Product Information Page Diaphragm Seal attached to Bellows Gauge DS-PI-18B 🇬🇧
- 📄 Product Information Page Instruments not Available with Diaphragm Seals DS-PI-87 🇬🇧
- 📄 Product Information Page Diaphragm Seal with Vacuum Gauge DS-PI-45A 🇬🇧
- 📄 Product Information Page Diaphragm Seal with Dampening Device DS-PI-17B 🇬🇧
- 📄 Product Information Page Diaphragm Seal Volumetric Displacement DS-PI-15 🇬🇧
- 📄 Product Information Page Diaphragm Seal Type 740 DS-PI-73 🇬🇧
- 📄 Product Information Page Diaphragm Seal Temperature Error DS-PI-14 🇬🇧
- 📄 Product Information Page Diaphragm Seal High Temp Fill Fluid DS-PI-55C 🇬🇧
- 📄 Product Information Page Diaphragm Seal Failures and Corrective Steps DS-PI-04 🇬🇧
- 📄 Product Information Page Diaphragm Seal Chlorine Bromine Fluorine DS-PI-32A 🇬🇧
- 📄 DS-PI-82 pi-page-minimum-maximum-pressures-for-diaphragm-seal EN 03-2023 🇬🇧
Drawings + Models
- 📄 Drawing Diaphragm Seal DF XAPI 🇬🇧
- 📄 Drawing Diaphragm Seal 741 XPU 🇬🇧
- 📄 Drawing Diaphragm Seal 741 🇬🇧
Safety Data Sheets
The Ashcroft® 740 and 741 high-displacement diaphragm seals are used with low-ranged instruments or high static pressure differential pressure gauges with low differential pressure. Used to ensure material compatibility, they are also applied when process media exhibit pulsation or the potential to clog an instrument connection. An ideal product for satisfying low pressure measurement needs.
Key Features
Selection of wetted materials
Material certificates to EN 10204:2004 3.1
Flush port (optional) provides easy cleaning / flushing for process media prone to clogging
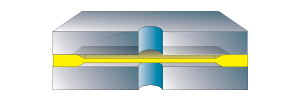
Enlarged welded diaphragm; high displacement allows high sensitivity to pressure fluctuations
Markets & Applications
Water and Wastewater
Chemical and Petrochemical
Oil and Gas
Refinery
NACE Compliant Processes (Sour Gas Separation)
- Specifications
- Downloads
Instrument Connection Style
Welded
Threaded
Wetted Parts Material
Stainless steel 316L (1.4404)
Tantalum
Monel
Hastelloy C
Hastelloy B
Titanium
Carpenter 20 (2.4660)
Pressure Rating
50 bar / 750 psi
Case or Body Material
Stainless steel 316L (1.4404)
Process Connection Style
Threaded with flushing port
Threaded
Accuracy
Added Tolerance ±0.5% typical
Data Sheets
Installation + Maintenance
Selection Guides
Product + Technical Information
- 📄 Product Information Page Product for Sour Oilfield NACE MRO0175 and Sour Petroleum Refining Operations NACE MRO0103 ASH-PI-60D 🇬🇧
- 📄 Product Information Page Diaphragm Seal attached to Bellows Gauge DS-PI-18B 🇬🇧
- 📄 Product Information Page Instruments not Available with Diaphragm Seals DS-PI-87 🇬🇧
- 📄 Product Information Page Diaphragm Seal with Vacuum Gauge DS-PI-45A 🇬🇧
- 📄 Product Information Page Diaphragm Seal with Dampening Device DS-PI-17B 🇬🇧
- 📄 Product Information Page Diaphragm Seal Volumetric Displacement DS-PI-15 🇬🇧
- 📄 Product Information Page Diaphragm Seal Type 740 DS-PI-73 🇬🇧
- 📄 Product Information Page Diaphragm Seal Temperature Error DS-PI-14 🇬🇧
- 📄 Product Information Page Diaphragm Seal High Temp Fill Fluid DS-PI-55C 🇬🇧
- 📄 Product Information Page Diaphragm Seal Failures and Corrective Steps DS-PI-04 🇬🇧
- 📄 Product Information Page Diaphragm Seal Chlorine Bromine Fluorine DS-PI-32A 🇬🇧
- 📄 DS-PI-82 pi-page-minimum-maximum-pressures-for-diaphragm-seal EN 03-2023 🇬🇧
Drawings + Models
- 📄 Drawing Diaphragm Seal DF XAPI 🇬🇧
- 📄 Drawing Diaphragm Seal 741 XPU 🇬🇧
- 📄 Drawing Diaphragm Seal 741 🇬🇧
Safety Data Sheets
We’re glad to be there for you personally.
Siamo personalmente a vostra disposizione!
Nous sommes personnellement là pour vous.
Şahsen yanınızda olmaktan mutluluk duyuyoruz.
We zijn blij dat we er persoonlijk voor u kunnen zijn.
Wir sind persönlich für Sie da!
Siamo personalmente a vostra disposizione!
Nous sommes personnellement là pour vous!
Select your Region!

