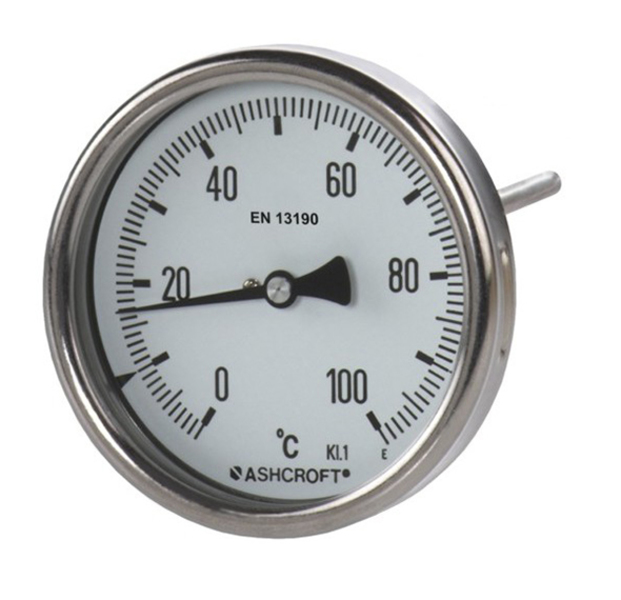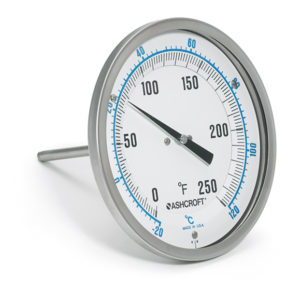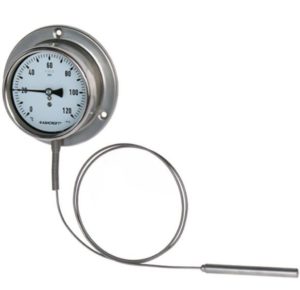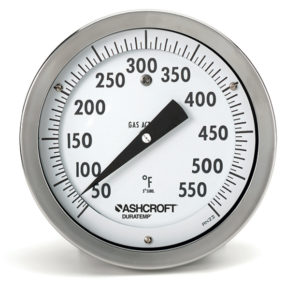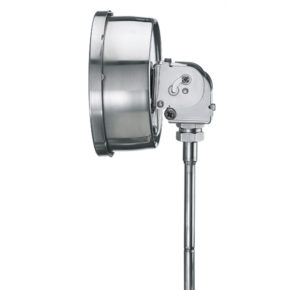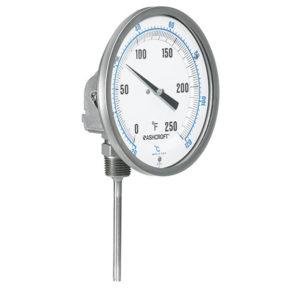

Model A Bimetal Thermometer
Model A Bimetal Thermometer
Process Market:
- Offshore Oil Rigs
- Chemical and Petrochemical Plants
- Water and Wastewater Pressure Control
- Pulp and Paper
- Refineries
- Power
Industrial Market:
- General Industrial
- HVAC
- Equipment Skids
Medical and Life Sciences:
- Pharmaceutical / Biotech
- Food and Beverage
Installation + Maintenance
- 📄 Instruction manual Bimetal Thermometer Model A ATEX 🇬🇧
- 📄 Instruction manual Bimetal Thermometer Model A 🇬🇧
Declaration of Conformity
- 📄 ATEX EU DoC Thermometer Ax_Ex TBA TB 08-2022 🇩🇪🇬🇧
- 📄 UKCA UKEX DoC Thermometer Ax_Ex TBA TBE 08-2022 🇩🇪🇬🇧
Industry Brochures
- 📄 Instrumentation for Water Treatment and Waste Water Industries 🇬🇧
- 📄 Instrumentation for Air Conditioning, Heating and Refrigeration Industries 🇬🇧
Drawings + Models
- 📄 Drawing Bimetal Thermometer 160 A E 074 EN 🇬🇧
- 📄 Drawing Bimetal Thermometer 160 A E 072 🇬🇧
- 📄 Drawing Bimetal Thermometer 160 A E 071 🇬🇧
- 📄 Drawing Bimetal Thermometer 160 A E 070 🇬🇧
- 📄 Drawing Bimetal Thermometer 160 A E 061 🇬🇧
- 📄 Drawing Bimetal Thermometer 160 A E 060 🇬🇧
- 📄 Drawing Bimetal Thermometer 160 A E 040 🇬🇧
- 📄 Drawing Bimetal Thermometer 160 A R 081 🇬🇧
- 📄 Drawing Bimetal Thermometer 160 A R 060 🇬🇧
- 📄 Drawing Bimetal Thermometer 160 A R 040 🇬🇧
- 📄 Drawing Bimetal Thermometer 160 A L 081 🇬🇧
- 📄 Drawing Bimetal Thermometer 100 A E 095 🇬🇧
- 📄 Drawing Bimetal Thermometer 100 A E 090 🇬🇧
- 📄 Drawing Bimetal Thermometer 100 A E 074 EN 🇬🇧
- 📄 Drawing Bimetal Thermometer 100 A E 071 🇬🇧
- 📄 Drawing Bimetal Thermometer 100 A E 070 🇬🇧
- 📄 Drawing Bimetal Thermometer 100 A E 065 🇬🇧
- 📄 Drawing Bimetal Thermometer 100 A E 061 🇬🇧
- 📄 Drawing Bimetal Thermometer 100 A E 060 🇬🇧
- 📄 Drawing Bimetal Thermometer 100 A E 042 🇬🇧
- 📄 Drawing Bimetal Thermometer 100 A E 040 🇬🇧
- 📄 Drawing Bimetal Thermometer 100 A R 090 🇬🇧
- 📄 Drawing Bimetal Thermometer 100 A R 081 🇬🇧
- 📄 Drawing Bimetal Thermometer 100 A R 073 🇬🇧
- 📄 Drawing Bimetal Thermometer 100 A R 040 🇬🇧
- 📄 Drawing Bimetal Thermometer 100 A L 070 🇬🇧
- 📄 Drawing Bimetal Thermometer 100 A L 061 🇬🇧
- 📄 Drawing Bimetal Thermometer 100 A L 060 🇬🇧
Safety Data Sheets
Key Features
External zero adjustment (optional)
Silicone dampened coil or liquid-fill option for reduction of pointer flutter in high vibration applications and improved response times
316L Stainless Steel housing available
All-welded stainless steel construction
Markets & Applications
Pharmaceuticals
Pumps and Compressors
HVAC-R
Chemical and Petrochemical
Pulp and Paper
Energy
Water and Wastewater
Food and Beverage
Oil and Gas
Machine Automation
Hydrogen and Technical Gases
- Specifications
- Downloads
Ingress Protection
IP66 / NEMA 4
Case or Body Material
Stainless steel 304 (1.4301)
Stainless steel 316L (1.4404)
Process Connection Location
Everyangle™
Lower
Centre back
Stem length
63 ... 1500 mm
Mounting
Stem
Case Style
Case with bayonet ring
Dampening
Silicone dampened coil
Liquid fill
Dial Size
100 mm
160 mm
Ranges
-50 ... 500°C
Process Connection Style
Adjustable union
Swivel nut
Fixed thread
Union
Accuracy
Class 1 acc. to EN 13190
Wetted Parts Material
Stainless steel 316L (1.4404)
Installation + Maintenance
- 📄 Instruction manual Bimetal Thermometer Model A ATEX 🇬🇧
- 📄 Instruction manual Bimetal Thermometer Model A 🇬🇧
Declaration of Conformity
- 📄 ATEX EU DoC Thermometer Ax_Ex TBA TB 08-2022 🇩🇪🇬🇧
- 📄 UKCA UKEX DoC Thermometer Ax_Ex TBA TBE 08-2022 🇩🇪🇬🇧
Industry Brochures
- 📄 Instrumentation for Water Treatment and Waste Water Industries 🇬🇧
- 📄 Instrumentation for Air Conditioning, Heating and Refrigeration Industries 🇬🇧
Drawings + Models
- 📄 Drawing Bimetal Thermometer 160 A E 074 EN 🇬🇧
- 📄 Drawing Bimetal Thermometer 160 A E 072 🇬🇧
- 📄 Drawing Bimetal Thermometer 160 A E 071 🇬🇧
- 📄 Drawing Bimetal Thermometer 160 A E 070 🇬🇧
- 📄 Drawing Bimetal Thermometer 160 A E 061 🇬🇧
- 📄 Drawing Bimetal Thermometer 160 A E 060 🇬🇧
- 📄 Drawing Bimetal Thermometer 160 A E 040 🇬🇧
- 📄 Drawing Bimetal Thermometer 160 A R 081 🇬🇧
- 📄 Drawing Bimetal Thermometer 160 A R 060 🇬🇧
- 📄 Drawing Bimetal Thermometer 160 A R 040 🇬🇧
- 📄 Drawing Bimetal Thermometer 160 A L 081 🇬🇧
- 📄 Drawing Bimetal Thermometer 100 A E 095 🇬🇧
- 📄 Drawing Bimetal Thermometer 100 A E 090 🇬🇧
- 📄 Drawing Bimetal Thermometer 100 A E 074 EN 🇬🇧
- 📄 Drawing Bimetal Thermometer 100 A E 071 🇬🇧
- 📄 Drawing Bimetal Thermometer 100 A E 070 🇬🇧
- 📄 Drawing Bimetal Thermometer 100 A E 065 🇬🇧
- 📄 Drawing Bimetal Thermometer 100 A E 061 🇬🇧
- 📄 Drawing Bimetal Thermometer 100 A E 060 🇬🇧
- 📄 Drawing Bimetal Thermometer 100 A E 042 🇬🇧
- 📄 Drawing Bimetal Thermometer 100 A E 040 🇬🇧
- 📄 Drawing Bimetal Thermometer 100 A R 090 🇬🇧
- 📄 Drawing Bimetal Thermometer 100 A R 081 🇬🇧
- 📄 Drawing Bimetal Thermometer 100 A R 073 🇬🇧
- 📄 Drawing Bimetal Thermometer 100 A R 040 🇬🇧
- 📄 Drawing Bimetal Thermometer 100 A L 070 🇬🇧
- 📄 Drawing Bimetal Thermometer 100 A L 061 🇬🇧
- 📄 Drawing Bimetal Thermometer 100 A L 060 🇬🇧
Safety Data Sheets
- Category: Indicating Thermometers

